Road Bike Buying Guide
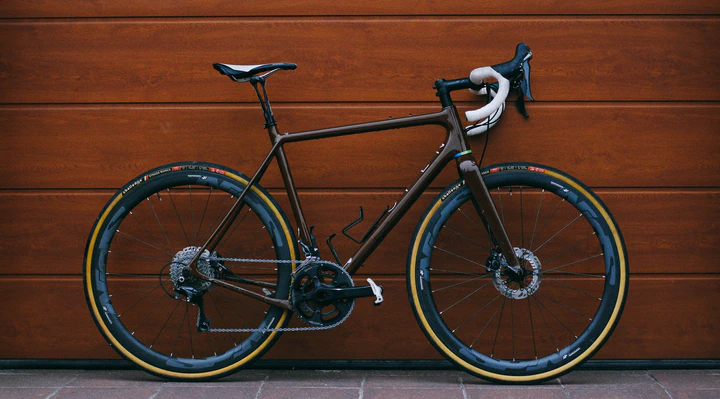 Photo by Dmitrii Vaccinium on Unsplash
Starting with my sister and brother-in-law, I have been approached by a fair number of people interested in buying their first road bikes. Having had a couple of my own at this point, and probably spending too much time obsessing over cycling in general, I put down some practical notes that can hopefully help the prospective road cyclist choose a worthy first bike that won’t break the bank.
The bike industry changes fast, and as this guide is now three years old, there are some things that probably aren’t covered enough in depth (for example electronic shifters or 12-speed groupsets). But most of the basics still apply, so if you are thinking about dipping into road cycling, this post is for you!
Ok, so here are some notes on buying a road bike and getting all set up. The first section provides some info about bikes themselves, and the second section will discuss other kit, etc. that you’ll want to have together.
Table of Contents
I. Bikes
So I’ll assume you are interested in a road bike, which by most general definition has drop handlebars, skinny-ish tires suitable for riding on paved roads, and a wide selection of gears for both going fast on flats/downhill, and climbing hills. We can talk cost later (there’s a huge range!) but for now assume everything mentioned here is thinking in the “solid starter up to intermediate” range of road bikes. A very approximate price range here would be maybe $800 - $2000.
There are three basic elements you can think about when buying a bike:
- The frame
- The wheels
- The components
1. The frame
The frame is the most important part of the bike, and probably the only one that would likely never be replaced (whereas you can replace wheels and components). The two most important aspects of the frame are the material that they are made out of and their geometries.
TL;DR: Look for a good aluminum frame bike, with an endurance style geometry, and you’ll be happy without breaking the bank. If you want to spend a little more, a carbon frame bike is well worth the extra money but things get expensive fast. If you think you might be interested in doing offroad riding too, consider a gravel bike.. see the notes below.
Materials
You will find good road bike frames are typically made from one of 3 materials: carbon fiber, aluminum, or steel.
- Carbon Fiber: Most high end road bikes are made of carbon fiber. (Both my and Mandeep’s nice bikes are carbon.)
- Pros: It is extremely light but also exceptionally strong, which of course is desirable (the lighter the bike, the less work you have to do to move it). Another advantage to carbon is its dampening property - it’s natural flexibility will give you a smoother ride over rough surfaces, but still is very firm and responsive (too much flex and you are just sacrificing energy you put into the pedals that is absorbed in the frame instead of pushing the bike along.)
- Cons: It is quite expensive. An entry level road bike with a carbon frame will likely be closer to $2000 to start, though it will depend on lots of other things too.
- Aluminum: This is what many entry-level bikes are made of, though there are also very high end aluminum bikes too.
- Pros: It is also extremely light (close to carbon fiber) and strong. The does not flex much to it is firm and responsive. It is far less expensive than carbon fiber. You’ll see aluminum frame bikes all over the sub-$1000 range, but also upwards into the thousands (For example the Cannondale CAAD 13 racing bike is a vary popular aluminum frame high-end bike).
- Cons: Because there is little flex, the ride will be less smooth than carbon (or steel). You’ll “feel the road” more. (This can be offset by tire choice and other things, which I’ll mention as we go.)
- Steel: Used to be very common (most old vintage bikes you see used as a commuter bikes are steel, like Mandeep’s orange Peugeot, but also too my newer commuter bike I was riding). Less common, more boutique now.
- Pros: It is less rigid than aluminum, so it offers a very smooth, comfortable ride.
- Cons: Steel is HEAVY. So a steel framed bike will weigh considerably more than carbon or aluminum, thus making it a less popular choice for road bikes. You do occasionally see some very nice high end steel framed bikes, but in these cases often the weight of the frame has been offset by using extremely high end/lightweight wheels and components to get it back to a reasonable weight. I wouldn’t really recommend steel for an all around road bike unless you are really set on it.
Geometry
Road bikes usually (but not always) are categorized as follows: endurance, racing, or aero. (Different companies might have slightly different terms for them.) Between endurance and racing, the main difference is the geometry: endurance bikes will tend to have a slightly longer wheelbase with the handlebars up a little higher. The longer wheelbase makes for a steadier ride (small steering movements have a smaller/slower effect), vs racing bikes, which are VERY responsive for quick/tight steering, cornering, etc. The position of the handlebars in relation to your seat (“stack” = height in relation to seat; “reach” = distance from seat) is more relaxed with an endurance frame: higher up and closer to the body, resulting in a more upright position. This is less aerodynamic (read: slower) but more comfortable for longer rides.1 Racing bikes are fun and fast (my main road bike has a racing geometry and it’s great), but it takes some time to get your body used to the extremely aerodynamic position for long periods of time.
Aero bikes are kind of a different thing entirely, made specifically for speed and not much else, thus, not super comfortable, not great for long rides, also super expensive. Besides a more extreme geometry, they are exceptional for their other aerodynamic features like special wind-shearing shape of the tubes, etc. But, you know, ridiculously fast.
Gravel bikes
Gravel bikes have become all the rage in the recent years and for good reason. They are similar to road bikes (specifically more towards relaxed endurance geometries), with accommodation for wider tires (for offroad use). Additionally the frames have usually been purpose designed for some shock absorption, more so than with a standard road bike frame. They are usually carbon fiber, though there are many nice aluminum frame gravel bikes out there too. Pretty much all big brands make gravel bikes these days, at a range of price points. But they are generally a bit more expensive than a regular road bike.
2. Wheels
Wheels are as simple (or as complex) as you want to make them, but basically you can think of two things - the actual wheels (rims/spokes/hubs) and tires.
Wheels
When you buy a bike, unless you are starting at the higher end of the market (say $4000+++), pretty much all wheels are made of aluminum alloy. This is fine, they work great, and you’ll be happy. Higher end wheels are made of carbon fiber - and carbon wheels ARE amazing. Like the frames they are comfortable, super light, and super fast. But they cost thousands.
There are also different widths and things like that that can accommodate different tire sizes. If you are sticking to a real road bike (as opposed to a gravel bike) typically your tires width will be somewhere in the range of 23mm to 28 or maybe 30mm max. Tires larger than that and they won’t fit between the chainstays of the frame. This is one area that a gravel bike specifically accommodates, in that they are typically designed to take a tire that could be up to 40 or 45 mm. If you think you’d like a bike that could do some offroad riding, then this is something you’ll want to consider!
Tires
Your standard road tires will be in the 23 - 28mm width. A wider tire will be a bit more comfortable. I’ve moved from 25mm to 28mm tires and was surprised at what a difference it made. Pretty much all road bike wheels will be able to accommodate this range.
If your bike will accommodate a wider tire (thinking gravel bike), then a typical width might be somewhere between 32 and 42mm. You can get them “slick” for more paved, or knobby/treaded for more offroad.
If you have a gravel bike and don’t mind the process, you can keep two different sets of tires, one skinny/slick for paved roads and another fat/knobby for gravel. It takes some time to unmount and mount tires onto the rims and is best only done with clinchers (tires set up with inner tubes - see next section). A more convenient (and expensive!) option is to buy a second set of wheels so you have one set up with skinny road tires and one set up with bigger gravel tires, then you can just switch immediately and don’t have to worry about mounting tires.
“Clinchers” vs “tubeless” (vs “tubular”) tires
- Clinchers are the typical bike setup you are familiar with. There’s an inner tube inside. Anything goes wrong, replace or patch the tube and get back out there. It’s easy and no fuss.
- Tubeless tires are all the rage these days. No inner tubes, instead the tires and wheels are “tubeless ready” and interface together in the same way a car’s tires work. A liquid sealant is injected into the tire which works to seal the bead and also magically seal any small punctures you might encounter. They are great, the advantages are better puncture protection and a smoother ride, as they can be ridden at lower pressure than clinchers. But they are also kind of a hassle if you don’t want to spend a lot of time mucking around setting them up.
- Tubular is what racers use. They are not recommended for recreational riding.
Fixing a punctured tire on a ride: Inevitably this will happen to you, so it is good to be prepared to be able to fix it on the fly. Invest in a little saddle bag that can fit under your seat that has: a spare tube, an extra tube patch kit (in case you have more than one flat… it can happen, though rarely), and tire levers. And carry a small pump, either attached to your frame or in your jersey pocket.
3. Components, etc.
The third and final consideration for a bike are the components and all of the other smaller parts (finishing kit). The components are essentially the drivetrain (front and rear derailleurs, chain rings and cassette on your rear tire, crank arms, chain, bottom bracket, etc.) and brake system (brake pads, calipers, and rotors if disc brakes), as well as the shift/brake levers and all the cabling. Then there is the ‘finishing kit’, including things like the handlebars, seat, bar tape, etc.2
Components (aka ‘groupset’)
Manufacturers
Shimano is the overwhelming leader in bicycle components and most bikes you’ll look at will be equipped with Shimano. They are great and you can be happy about it. (All of the road and gravel bikes that I and Mandeep own or have owned have been equipped with Shimano.)
There are others out there of course, which are very good as well: SRAM has come up to position itself as the only other major component brand commonly seen on road bikes. Others, like Campagnolo, are around but less common, and often exorbitantly expensive. I’ll discuss Shimano because they are the most popular and I am very familiar with them, having had them on all my road bikes.
At the time of this little update, something not mentioned in this guide is electronic shifting. Once viewed with suspicion as bleeding edge technology with a tendency to fail at the wrong time, it has gradually made its way through the professional peloton and onto a great number of mid- to high-end road bikes. This summer I rented a top of the line Willier road bike with Shimano Ultegra Di2 electronic shifting and absolutely loved it. My next bike will probably have electronic shifting. It’s great. It’s also fairly expensive and probably not really worth it for a first (or even moderate upgrade) road bike. But if you have the cash and want the best, consider it an option.
Shimano groupsets
It’s highly likely that you’ll be looking at bikes equipped with Shimano, so let’s talk about the different groupsets they offer. They have several different series (or levels), each comprising an entire groupset (e.g., the full set of components on a bike).
At the highest tier, there are three levels:
- Dura Ace: what professional racers (and rich dentists) use. The best. SUPER EXPENSIVE.
- Ultegra: high-end performance groupset at a somewhat affordable price. This is what is on my NICE road bike.
- 105: the lowest tier of the high end. Still maintains the basic specs of the top tier, but made of heavier materials and significantly less expensive. My gravel bike and last road bike have 105, and I highly recommend it.
2 x 11 speed configurations have been the standard for a long time: there are two chainrings in the front and an 11-speed cassette in the back, for a total of 22 speeds. Recently, 12-speed configurations have come out, and 1x configurations (with a single chainring in the front) have become more popular, mostly in the gravel bike sector, but occasionally seeping through into the road market as well.
Note also that electronic shifting, named in the Shimano ecosystem of groupsets as “Di2”, is now available in all three levels (Dura Ace, Ultegra, and 105).
Below 105, Shimano has other levels, Claris and Tiagra are common on bikes in the sub-$1000 range all the way up to maybe $1500. They are good too, but they don‘t share the same specifications of the three above and are of lower quality. I wouldn’t recommend against them necessarily, especially if you are trying to keep to a budget, but I would recommend that having the best components you can get will be worth it. You’ll shift smoother and more accurately, brake easier and with more confidence, and overall enjoy our ride more.
Mixed groupsets
Something else you might come across, especially in the sub-$1500 range, are bikes that mix component sets. The usual combination is Shimano derailleurs And shifters paired with generic manufacturer brakes, chain rings, and crank arms. The most common brakes you might see are Tektro. While it would be nicer to have a full Shimano groupset, this mixed arrangement is not the worst thing and will make the bike a bit more affordable (at the cost of better performance).
Brakes: rim vs. disc
Rim brakes have been the standard on road bikes since forever, and are likely what you picture when you think of brakes on a bike. However, the trend over the last few years has gone to disc brakes, which are set up much like a car with a rotor next to the hub of the wheel that the brake caliper grips to stop. For performance alone, there is no question that disc brakes simply perform better, especially in wet conditions or during heavy braking (e.g., descending a long hill). The disadvantages disc brakes are two:
- They are a complex system to maintain and repair, as opposed to rim brakes which are extremely simple. But you shouldn’t really have to do much maintenance with them in general. (And if so, you can just bring the bike to a shop - that’s what I do.)
- Overall they will be a bit more expensive than rim brakes. (However, it is now much more common that bikes are sold only with disc brakes and there is no option for rim.)
We have disc brakes on all our nice bikes and I think they are excellent.
Mechanical vs. hydraulic disc brakes
The standard disc brake setup (for example, in 105 groupsets and up) is a hydraulic system. Like a car, there is a little reservoir of hydraulic fluid in each brake/shift lever that runs down a brake hose to the caliper at each wheel. Braking is easy and responsive. However, lower end bikes will often have “mechanical disc brakes” that use a standard cable pull (like rim brakes) to the calipers. I don’t have any experience with these, but I’d be inclined to think if you have mechanical brakes anyways, then rim brakes are fine and no need to add the extra complexity of the discs if you don’t get the full hydraulic system. But likely you will be guided by what the stores have available and how the bikes in your price range are configured.
Finishing kit
There’s not too much to say here - every bike will have handlebars, a seat, etc. All of these things are infinitely adjustable, replaceable, upgradable, and more. So I’d say don’t worry about this stuff for your first purchase. If, as you ride and get comfortable, you find you want to start swapping things out, that’s fine (gate way to bike tinkering :P)!
II. Everything else
Great so you got a bike! If it came with pedals then great you’re ready to go, BUT there are several things that you’ll want to get set up with to assure you have a long life of enjoyable and safe riding.
1. Pedals and shoes
As mentioned before, higher end bikes usually aren’t sold with pedals, or might be sold with the cheapest most basic plastic pedals just so you can ride out of the store.
Pedals
Typically, any ‘performance’ style bike (be it road, gravel, mountain, etc.) will be used with clipless pedals.3 Their basic function has similar mechanics as a ski binding, and special cycling shoes are needed with them. To clip in, you press your shoe (which has a cleat attached to the bottom) down onto the pedal where is snaps into place. To clip out, you twist your foot sideways, rotating your heel away from the bike and the cleat pops out.
There are two basic types of clipless pedals, “road” (aka SPD-SL) and “mountain” (aka SPD).
- Road (SPD-SL pedals): These are the standard clipless pedals for road cycling and pretty much all ‘serious’ road riders have them, including Mandeep and I.
- Their advantages are that they are very stiff when you pedal, meaning that the power you put into the pedals is directly transferred into the drivetrain, making the whole system very efficient and responsive. The shoes as well have very stiff soles (often made of carbon fiber) so they do not bend, also helping with efficient power transfer.
- They do have some notable disadvantages though. First, they are more difficult to clip into as they are one-sided, meaning that as you take off from a stop you need to first ensure the pedal is oriented the right side up before clipping your shoe down into place. You do this with your toe, and with practice the whole clipping in from a stop is done in one motion. But it can be tricky at first, and also when starting on a hill, when you don’t have the benefit of coasting and clipping in slowly and methodically.
- A second disadvantage is that the cleats for SPD-SL pedals extend out from the bottom of the shoe a bit, so walking in road shoes is not very comfortable nor is it recommended beyond just a few steps (think walking in ski boots - not nearly as bad, but not the greatest).
- Mountain bike type pedals (SPD) are the common choice for gravel bikes and sometimes for road cyclists who want a clipless pedal that is a little easier to get in an out of and a little more comfortable.
- Advantages: They are purpose built for quickly clipping and unclipping, and are two-sided, meaning you don’t have to worry if the pedal is upright or not, you can just line your foot up and step down and you’ll clip in. The cleats are smaller and recessed into the bottom of the shoe, so walking normally is much easier. (I’ve used these pedals on my commuter bike for years and wore SPD shoes throughout the day, at the lab, etc. comfortably.)
- Disadvantages: SPD pedals and shoes lack the stiffness of SPD-SLs, so you lose some of the pedal efficiency described above. For very long or fast rides, SPD pedals are harder on your feet, as the constant flexing of the shoes can lead to more fatigue.
Shimano is the leading manufacturer of both types of pedals (SPD and SPD-SL are their designations), however there are many other manufacturers (and even other clipless systems). Shimano has a wide range of both styles, from inexpensive entry level (maybe $40 a pair) up to pro Dura Ace pedals for hundreds of dollars. Inexpensive ones are fine! As an alternative, Look and Wahoo/Speedplay are two other very good and reputable systems for road pedals.
Shoes
Both types of pedals need a specific shoe, and there are only two different types to match the two types of pedals: road or mountain/gravel (SPD-SL or SPD). They are also known as three hole cleat (road) or two hole cleat (mountain) shoes. You’ll find that the road shoes are much stiffer (as explained above) and have a smooth outsole, versus mountain/gravel shoes have a bit more flex and usually some tread on the bottom to accommodate walking around.
Shoes closure systems vary, though the popular thing for the last few years have been Boa closures, with a dial to clinch the shoe tight. These are great and highly recommended. Velcro straps are common in cheaper shoes and can be fine, though over time they will stretch out a bit.
Shopping for the right shoes is a hugely important step, and I would say probably the 2nd highest priority thing (behind the bike!) Make sure you find shoes that feel comfortable and support your foot in the right way. To do this I would suggest seeking out the most knowledgeable cycling store reps to guide you, and mostly, try many on. Everyone’s feet are different, but I have had great success with Fizik shoes and now own two pairs.
And of course, you’ll have to buy the correct type of shoes for the pedals you want (road or mtn/gravel, with the proper cleats to fit the pedals you have - Shimano/Look/Speedplay/etc.).
2. The rest of everything else
So with bikes, pedals and shoes, we’re now down to all the other things, clothing and such, to complete your setup:
- helmet: an absolute must for riding on the roads! Go for a ‘road’ style helmet, not the skateboard style that are popular with commuters. A good road helmet with be light and provide ample ventilation while you ride
- clothing: highly suggested to get right into the lycra game. You’ll only feel silly the first few times, but the comfort and breathability is 100% worth it. At the minimum you’ll want:
- a cycling jersey (pockets in the back are a must, you’ll use them all the time)
- cycling bibs - cycling shorts with shoulder straps. So much better than just the shorts as they support you with straps rather than around your waist which is annoying as you bike
- good cycling-specific socks (they should come up about halfway between your ankle and knee for proper bike fashion ;) but seriously quality socks are a must for happy cycling feet
- sunglasses: you may find you want more cycling specific glasses to block wind and sun out, but any good sunglasses will be fine.
- water bottles and cages for the bike - I’d recommend putting two cages on a bike, you don’t always need the second but for longer rides you’ll want 2 bottles with you!
- a small saddle bag for your emergency kit (see tools section below)
- (optional) - it’s totally not necessary, but Mandeep and I have been using a small handlebar bag (this one) that is very convenient when we are out on longer rides!
- (optional) - a cycling computer with GPS. These devices can be expensive ($300 or more) but give you GPS, maps, routing, and record your ride data all from your handlebars. Not compulsory, but if you ride a lot it is well worth the investment. I had the Wahoo Elemnt Bolt for years and loved it. Garmin is the other industry leader of cycling computers and makes great devices, and I currently use a Garmin Edge 530 (this has been replaced by the Edge 540).
Tools
For riding, I would recommend to prepare a small emergency kit that will allow you to fix any mechanical issues (within reason) that you might have on the road. The most common thing is a flat tire which, with a little practice, can be taken care of at roadside. This does take some practice though - I’d recommend watching some YouTube videos and practicing once or twice at home just to be sure you are prepared.
The following things can go in your kit:
- a multitool (specifically for cycling, sold at a bike shop)
- a spare tube
- tire levers
- a mini pump that can go in your jersey pocket if it doesn’t fit in your kit - you can also carry CO2 cartridges if you prefer
- (optional) inner tube patch kit, for if you have more than 1 flat
- (optional) CO2 cartridge and valve for inflating your tire if you don’t want to carry a pump
- (optional) ‘quick link’ for a chain, in case your chain breaks (this has never happened to me, but I carry them just in case)
You can buy a small saddle bag that fits under your seat to store everything. For all this stuff, I’d recommend getting the help/advice of a store rep to get all this stuff together for you in the right bag. They might have good/better suggestions, though the above is what works for me.
Tools for home
At home you’ll also want the following things:
- A good quality floor pump (that can be used with Presta valves which are the standard on road bikes, different from the more common Schrader valves on most bikes)
- a good set of metric allen (hex) keys
- chain lube - check with store rep for what they recommend based on season, type of riding, etc.
3. Extras
- [link] For good cycling knowledge, how-to videos and plenty of general cycling culture, etc. I’d recommend the Global Cycling Network (GCN) videos on YouTube
- [link] Park Tool is a huge manufacturer of bicycle tools with incredibly helpful video tutorials on just about every kind of bike maintenance you might need
- [link] Strava is a platform for recording your rides and keeping a log/history of your athletic activity. If you use a cycling computer (mentioned above) it will also sync your ride history from there. Strava has also has grown into a social network in it’s own right. If you pay for the Premium version, it has great route planning tools, which I use all the time.
- There are also several other ride planning (and ride logging) apps and websites. A couple I’ve used as well are:
Good luck and congratulations on taking the first steps towards becoming a road cyclist! And of course, make sure call me to go out for a ride!
All of these postitional things are adjustable too. You can raise and lower the handlebars, change the length and angle of the stem, and adjust your seat foreward and backwards to get a good position. ↩︎
Notice pedals aren’t mentioned here, they will have their own section below, and many higher end bikes aren’t sold with pedals, assuming that you’ll want to choose your own. ↩︎
‘Clipless’ is really a misnomer, as it is actually very much a pedal that you clip your shoes into!!! Anyways… ↩︎
John Sullivan
research / design / music
Postdoctoral researcher exploring research through design in the areas of music, movement, dance, and human-computer interaction.